
|
Adding or Editing Contact Data |
| Prev | Next |
Table of Contents -- Chapter 4
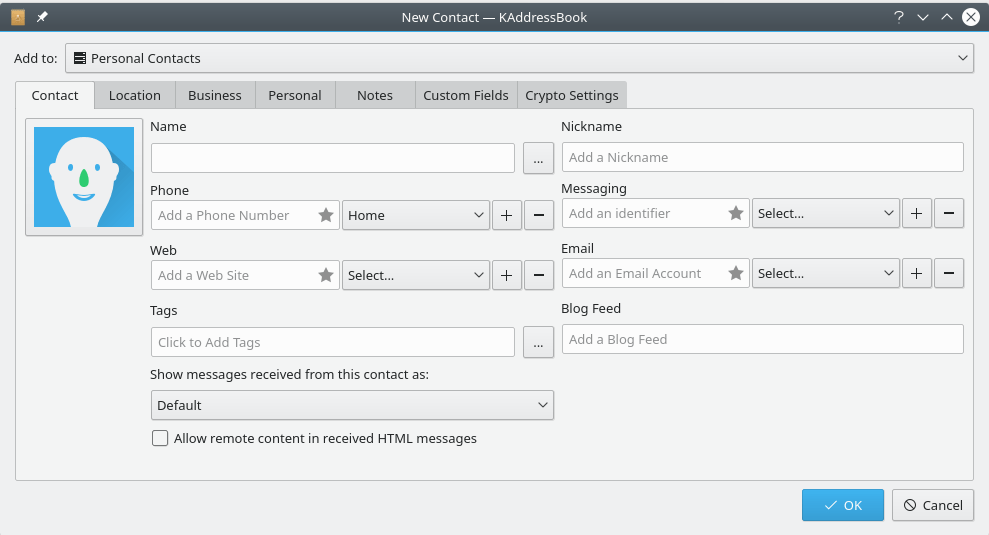
When you first click on the  Add Contact
button on KAddressBook's Toolbar, this screen will appear. (If you click on
Add Contact
button on KAddressBook's Toolbar, this screen will appear. (If you click on  Edit Contact , a similar screen appears, the only difference being
that the drop-down box labeled “Add to:” will not appear as part of the
“Edit” dialog. That is why both functions are covered in this chapter: they're practically identical.)
Edit Contact , a similar screen appears, the only difference being
that the drop-down box labeled “Add to:” will not appear as part of the
“Edit” dialog. That is why both functions are covered in this chapter: they're practically identical.)
 Add Contact button on the Toolbar.
We have already seen (in How to Add a New Contact)
how basic data like Name and Email are entered when a new contact record is created. Here's a description
of the many ways to use the rest of the data fields accessible from the “Contact” tab in
the Add Contact dialog.
You may associate one or more telephone numbers with this person. Use the and
buttons to add or delete phone number fields. The Home Drop Down Box allows you to identify fifteen categories of phone numbers (Home, Work,
Mobile, Car,ISDN,
PCS, etc.)
Drop Down Box allows you to identify fifteen categories of phone numbers (Home, Work,
Mobile, Car,ISDN,
PCS, etc.)
You may associate one or more Instant Messaging service identities with this person. Use the and
buttons to add or delete messaging service fields. The Select ...
Drop Down Box permits you to identify thirteen categories of IM services: AIM,
Facebook, Gadu-Gadu, Google Talk,
GroupWise,
ICQ, IRC, Jabber, Meanwhile,
SMS, Skype, Twitter, and Yahoo. (MSN Messenger is still on the list
of IM services in version 5.10.3; it has been defunct since 2014.)
You may associate one or more web site URLs with this person. Use the and
buttons to add or delete Web address fields. The Select ...
Drop Down Box allows you to identify three different kinds of Web addresses: Home, Work, and Other.
You may associate one or more Tags of your own devising with this person. Use the button to enter the Tag creation and configuration dialog illustrated below.
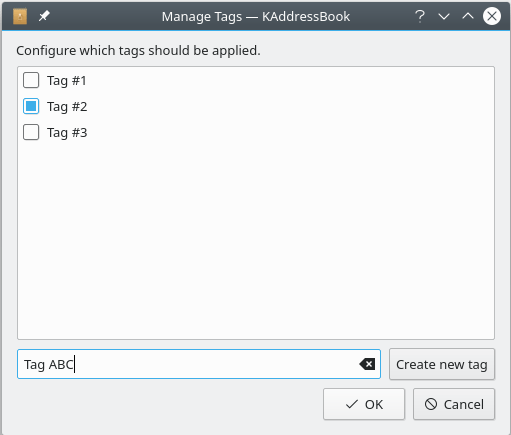
Use the button and the data entry field to the left to build your customized list of tags. Select the tags associated with this person from the list appearing in the configuration window. Press the button to add the selected tags to this contact.
Use this field to record the URL associated with this contact's web log, or blog.
Use this Drop Down Box to override the corresponding message display option in KMail's configuration menu. Choose “Default” to leave it up to KMail. Choose “Plain Text” or “HTML” if you want to override KMail's default behavior when you receive a message from this person.
Select this option if you want to override the corresponding message display option in KMail's configuration menu when you receive a message from this person.
Select this option to save the changes you have made. This button performs the same function in all
seven tabs appearing in the
Add Contact dialog.
Select this option to leave the Add Contact dialog
without saving your changes. This button performs the same function in all seven tabs appearing in
the “Add Contact” dialog.
Use the data input fields in the “Location” tab shown below to associate one or more snail-mail addresses with this person.
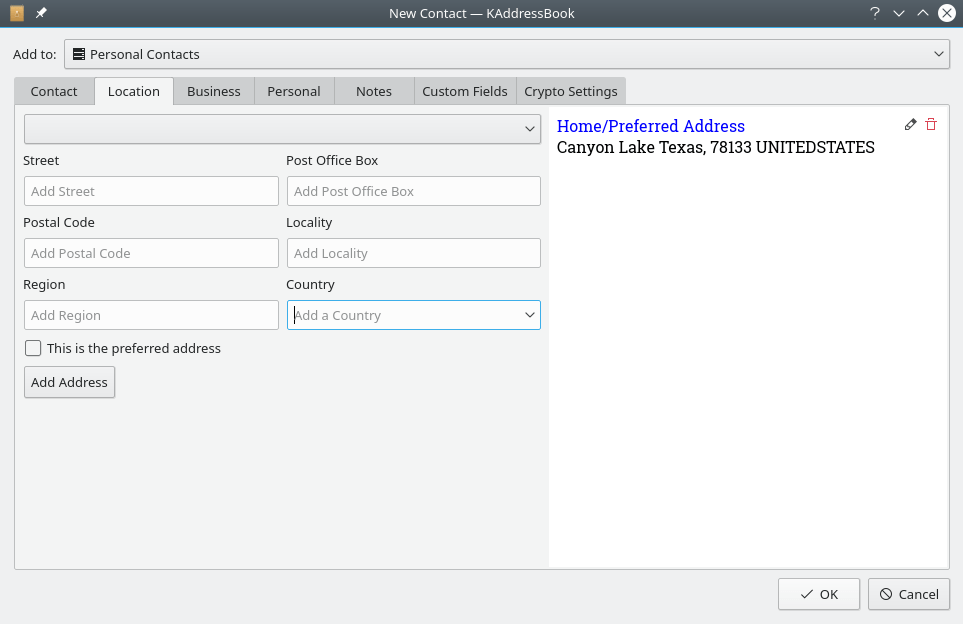
Use this list of categories to describe each mailing address for this contact. Available options include “Home”, “Work”, “Postal”, etc.
Use these free-form data fields to enter mailing address data: Street Address, PO Box, ZIP Code, City, and State, respectively, for addresses in the U.S.A.
Use this Drop Down Box to select a country, from Afghanistan to Zimbabwe.
Check this box to designate the preferred, or default, mailing address.
When you have finished entering address data, left click this button to add a new address to the set of saved addresses appearing in the large display window to the right.
in the large display windowLeft click this icon to edit the associated address data.
 in the large display window
Left click this icon to delete the associated address data.
The next three tabs in the “Add Contact” dialog are even simpler than the “Location” tab. They allow you to save some information about this person's business and professional affiliations, a few personal details, and miscellaneous free-form notes, respectively.
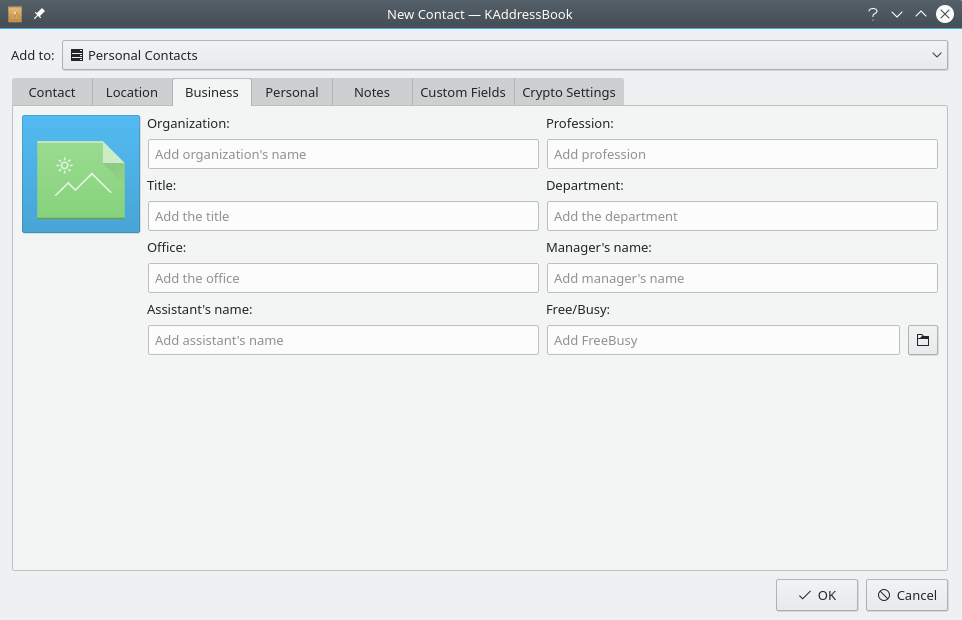
The “Business” tab, shown above, lets you save some additional details
about this person's professional and business associations. All the input fields are free-form; you may enter any kind of text data in each field. The small
 button will open a file search dialog, making it easy
to associate a filename with this person's “Free/Busy” schedule, if you wish.
button will open a file search dialog, making it easy
to associate a filename with this person's “Free/Busy” schedule, if you wish.
Notice that you should enter your business associate's phone as a telephone number under the “Contact” tab. Similarly, his office address is entered via the “Location” tab, as described in the preceding section.
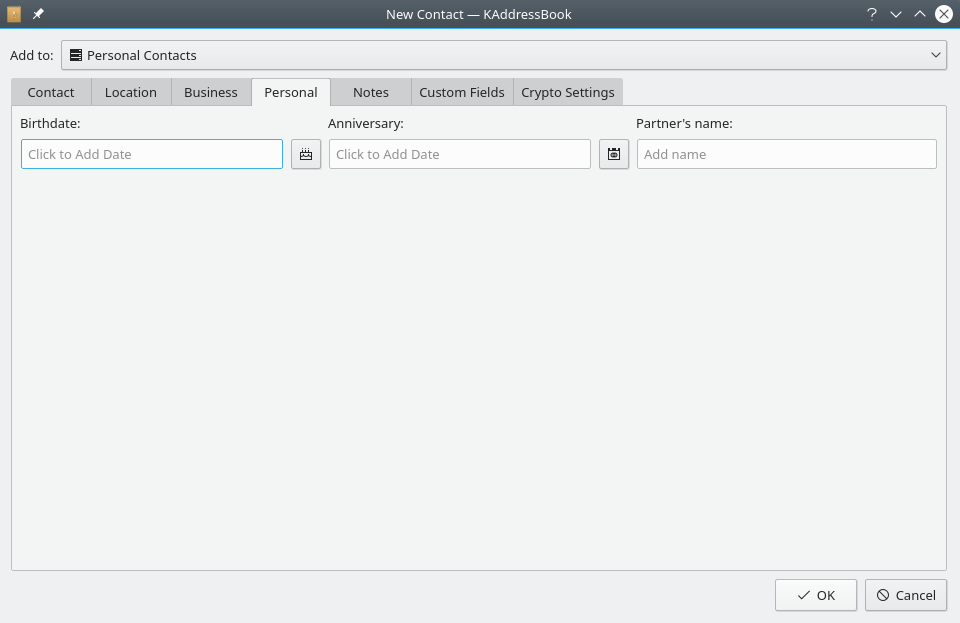
Use this tab to store a few personal details: this person's birthday, his wedding anniversary, and the name of his partner, or significant other. Click one of
the buttons (e.g.,  ) to
enter his date of birth, or his wedding anniversary.
) to
enter his date of birth, or his wedding anniversary.

The “Notes” tab provides a totally free-form input area in which you may enter any data you want to associate with this person.
| Prev | Contents | Next |
| KAddressBook's Interface with KOrganizer | Up | The Tricky Stuff |