
|
The Configure Toolbars Option |
| Prev | KAddressBook Advanced Features Reference Section | Next |
Here is a picture of the screen that appears when you click on the →
 Configure Toolbars... menu item.
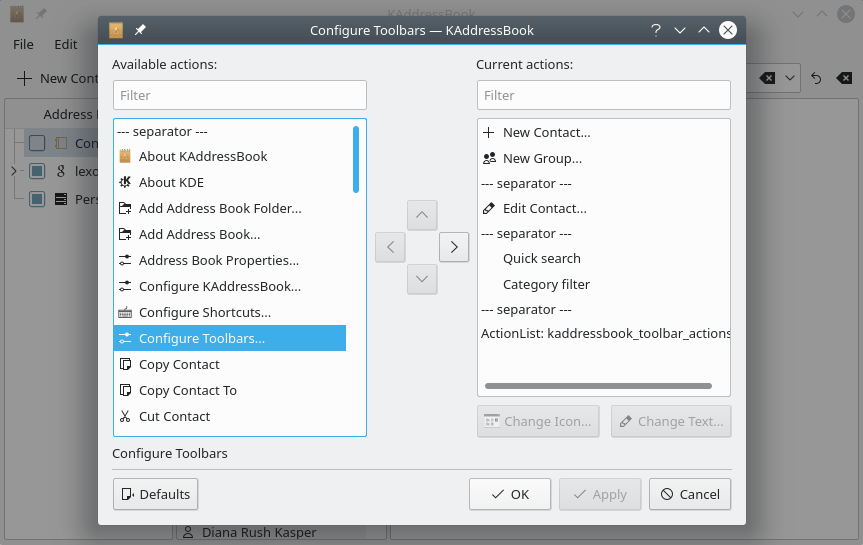
Use either one of the "Filter" fields to restrict the range of choices displayed in the corresponding
window. Select an action in the left-hand window (as shown above) if you wish to add it to the Toolbar.
Left click the  button to add the item to the list in the right-hand window (and thence to KAddressBook's Toolbar). If you want to delete an item from the Toolbar simply
reverse the procedure: highlight the item to be deleted from the right-hand window and click the
button to add the item to the list in the right-hand window (and thence to KAddressBook's Toolbar). If you want to delete an item from the Toolbar simply
reverse the procedure: highlight the item to be deleted from the right-hand window and click the  button. The
selected item will be removed from the Toolbar.
button. The
selected item will be removed from the Toolbar.
You may tailor the order in which selected items appear on the Toolbar by using drag and drop within the right-hand
window. The order of items on the Toolbar, left to right, corresponds with the order in the window, top to bottom. You may
make additional changes to the appearance of the Toolbar by using the
![]() Change Icon... button to alter the icon associated with a particular action. Similarly,
you may change the description of each item on the Toolbar by clicking the
Change Icon... button to alter the icon associated with a particular action. Similarly,
you may change the description of each item on the Toolbar by clicking the
 Change Text... button.
Use the  Defaults
button to restore the default Toolbar settings. Choose "OK" to save your changes and exit the dialog, "Apply" to apply
your changes while keeping the dialog open, or "Cancel" to exit the dialog without saving your changes. (See the
"Customizing KDE Software" chapter in the "Fundamentals" handbook for a more detailed explanation of this procedure.)
Defaults
button to restore the default Toolbar settings. Choose "OK" to save your changes and exit the dialog, "Apply" to apply
your changes while keeping the dialog open, or "Cancel" to exit the dialog without saving your changes. (See the
"Customizing KDE Software" chapter in the "Fundamentals" handbook for a more detailed explanation of this procedure.)
Click here to return to the Table of Contents for this Appendix.
| Prev | Contents | Next |
| The Configure Shortcuts Option | Up | The Configure KAddressBook Option |